
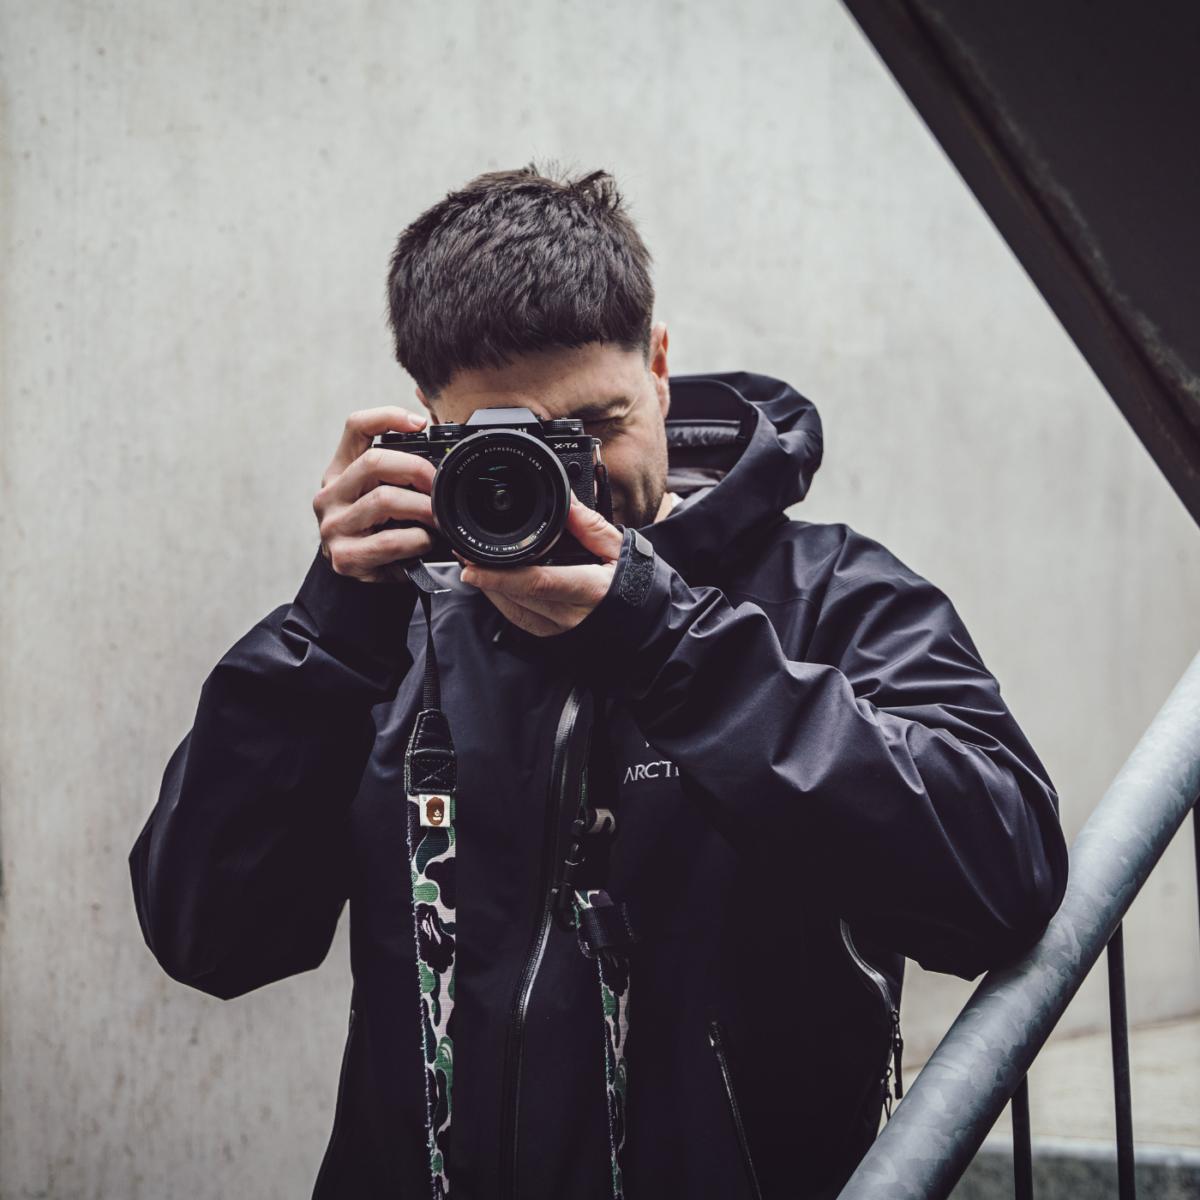

You know how it goes – you’ve just unboxed a fresh pair of kicks and you want to flex on the gram, but the standard angles and crummy lighting aren’t doing your new pair any justice. Well as always – we’re here to help. If you’ve always wanted to take better photos of your sneakers, we’ve got some great tips from photographer Chris Caporaso.
The best part? You can apply all of this wherever you live and with whatever you have – some of the best creators around are using their phones and an editing app.
Tip 1: Composition
According to Chris, there are a few basics you want to get right here – while also giving yourself license to find interesting angles and unique points of view.
“There’s a few fundamentals I look for when putting together a shot. I like straight lines – a straight horizon and nothing that conflicts with that elsewhere in the shot. With most editing software now it’s easy to straighten your image afterwards, but it’s always best to seek out clean, even lines.
The best shots are usually the ones you see most often – the side view of a sneaker is a lot better than shooting it front on, for instance. That doesn’t mean you shouldn’t look for other angles, but your go-to will usually be side-on, or ¾ shot. I like to start with that and then see what else looks interesting.”
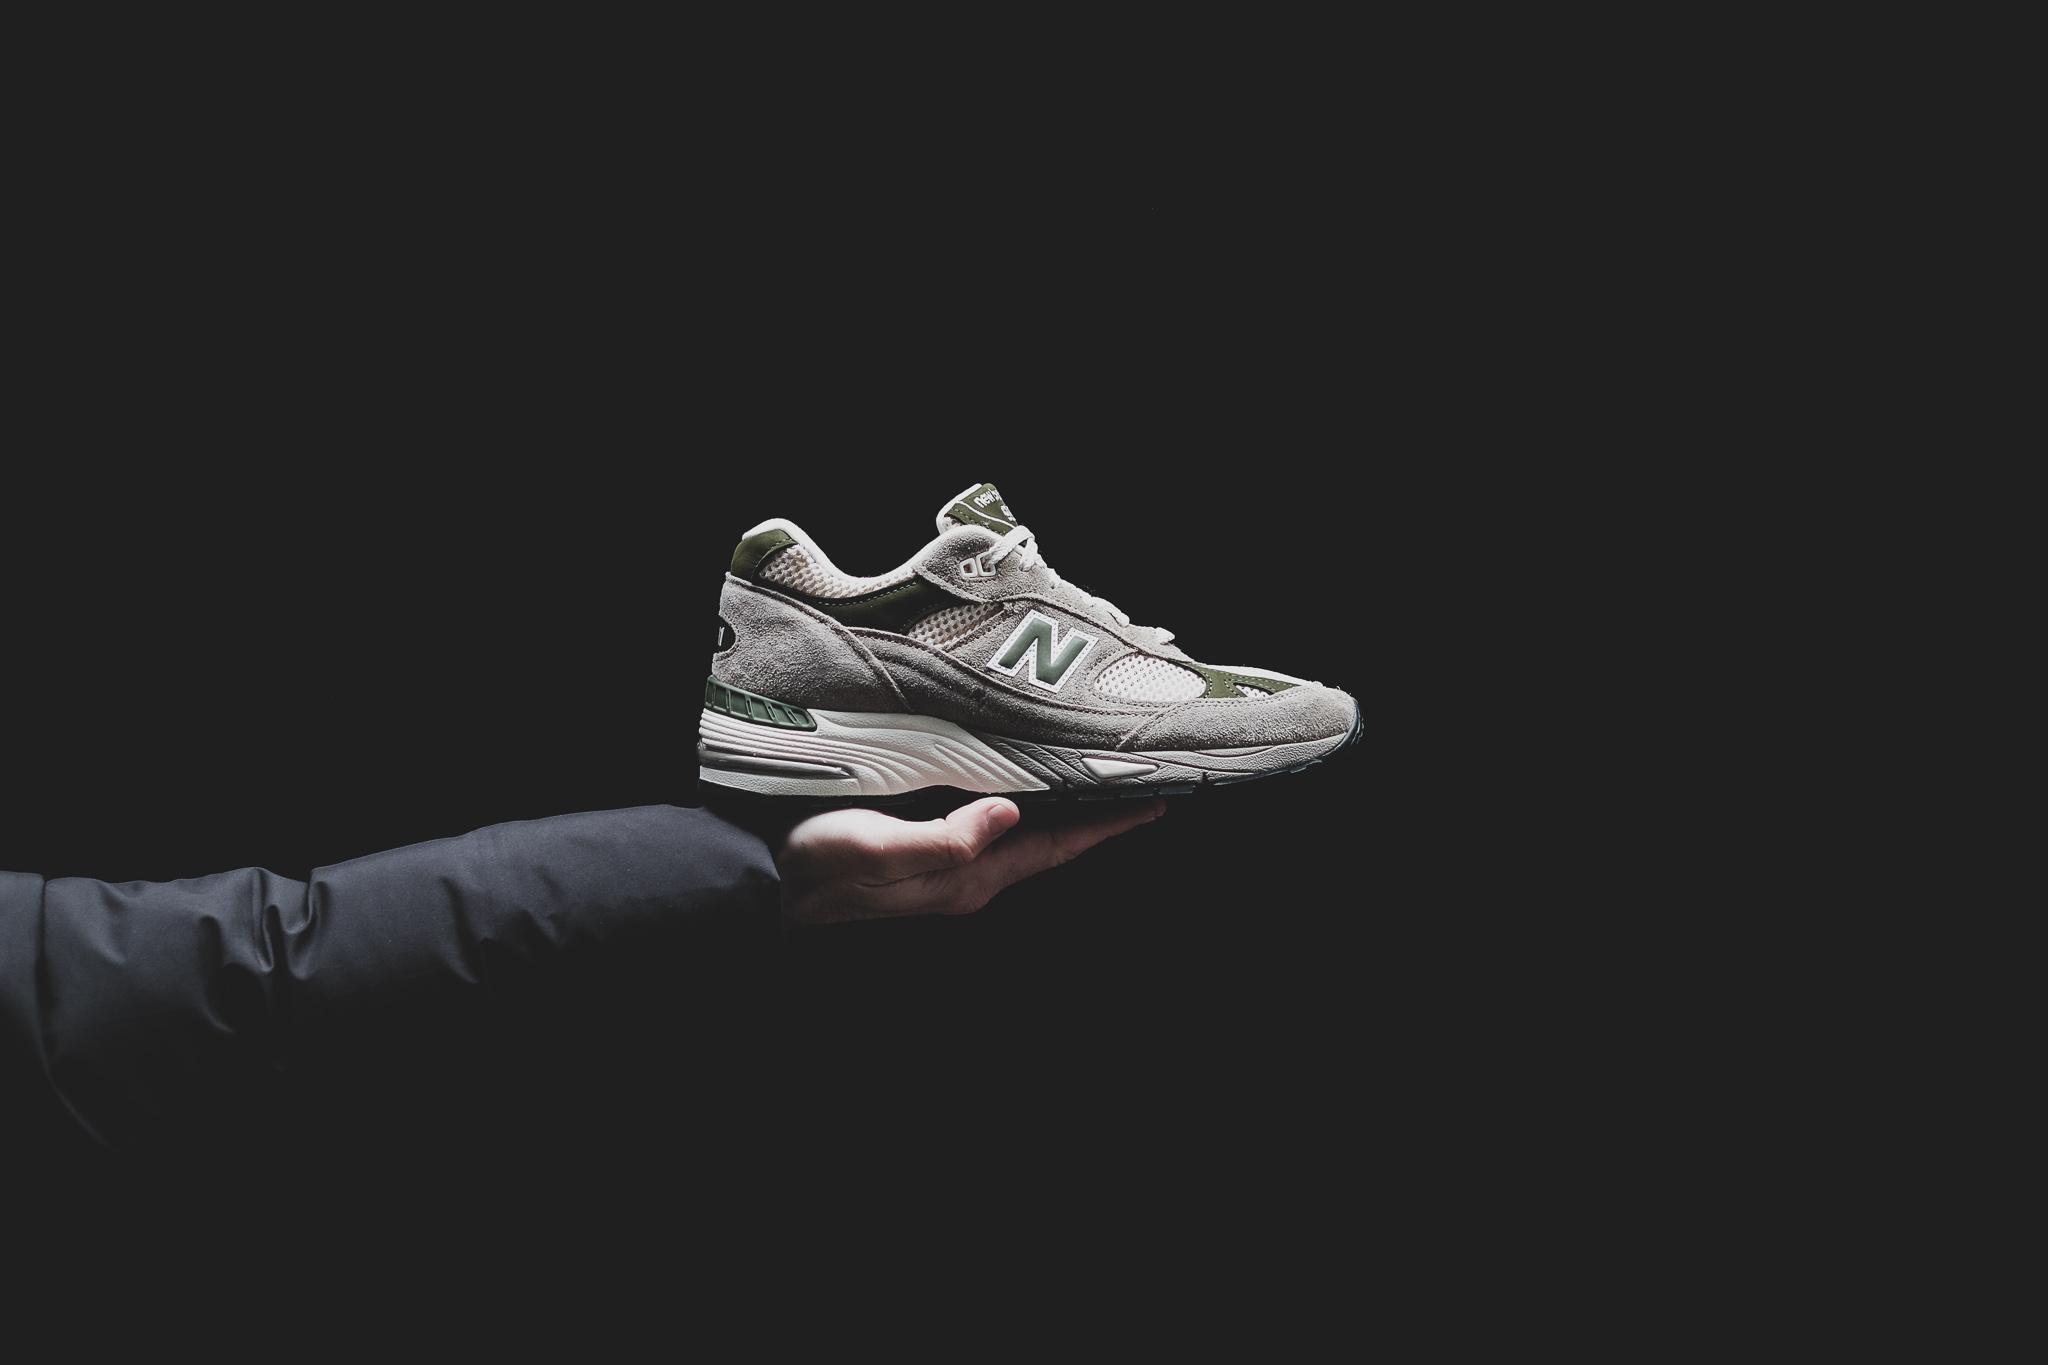
“Ideally you also want to have the shoe separated from the background – so you wouldn’t have it right next to a wall. Bring it away from the wall so you can create some softness and depth in the background and your shot will instantly look a lot better.
My last tip on composition would be to never shoot too close – it can distort the shape of the shoe and look unnatural. You’ll know it when you see it.”

Tip 2: Light
Anyone who has taken a photography course or had to listen to their nerdy uncle talk about photography will tell you the same thing – photography is all about mastering light. Understanding how it works and how to use it are key elements to taking great photos. According to Chris, there’s a couple of things to consider here.
“Definitely shoot in the morning if you can – once the sun gets too high and the light is directly overhead, it creates harsh shadows. Morning light is nice and soft.”
“The other thing to note would be that you want soft light – you’re better to shoot in the shade than the direct sun, which will be too harsh.“
Tip 3: Depth
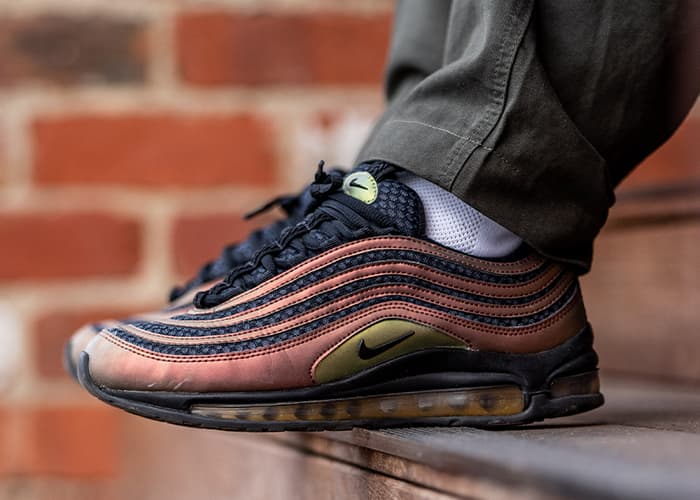
File this one under hidden gems – this is not a tip you’re likely to be getting elsewhere, but Chris rates foreground depth very highly. We’ll let him explain it.
“I really like foreground depth because I think it adds another dimension to the image and really draws your eye into the subject. You can use almost anything to create this foreground depth, but the key is to not overdo it. It’s a great trick for your toolkit but not something you want to do all the time.”
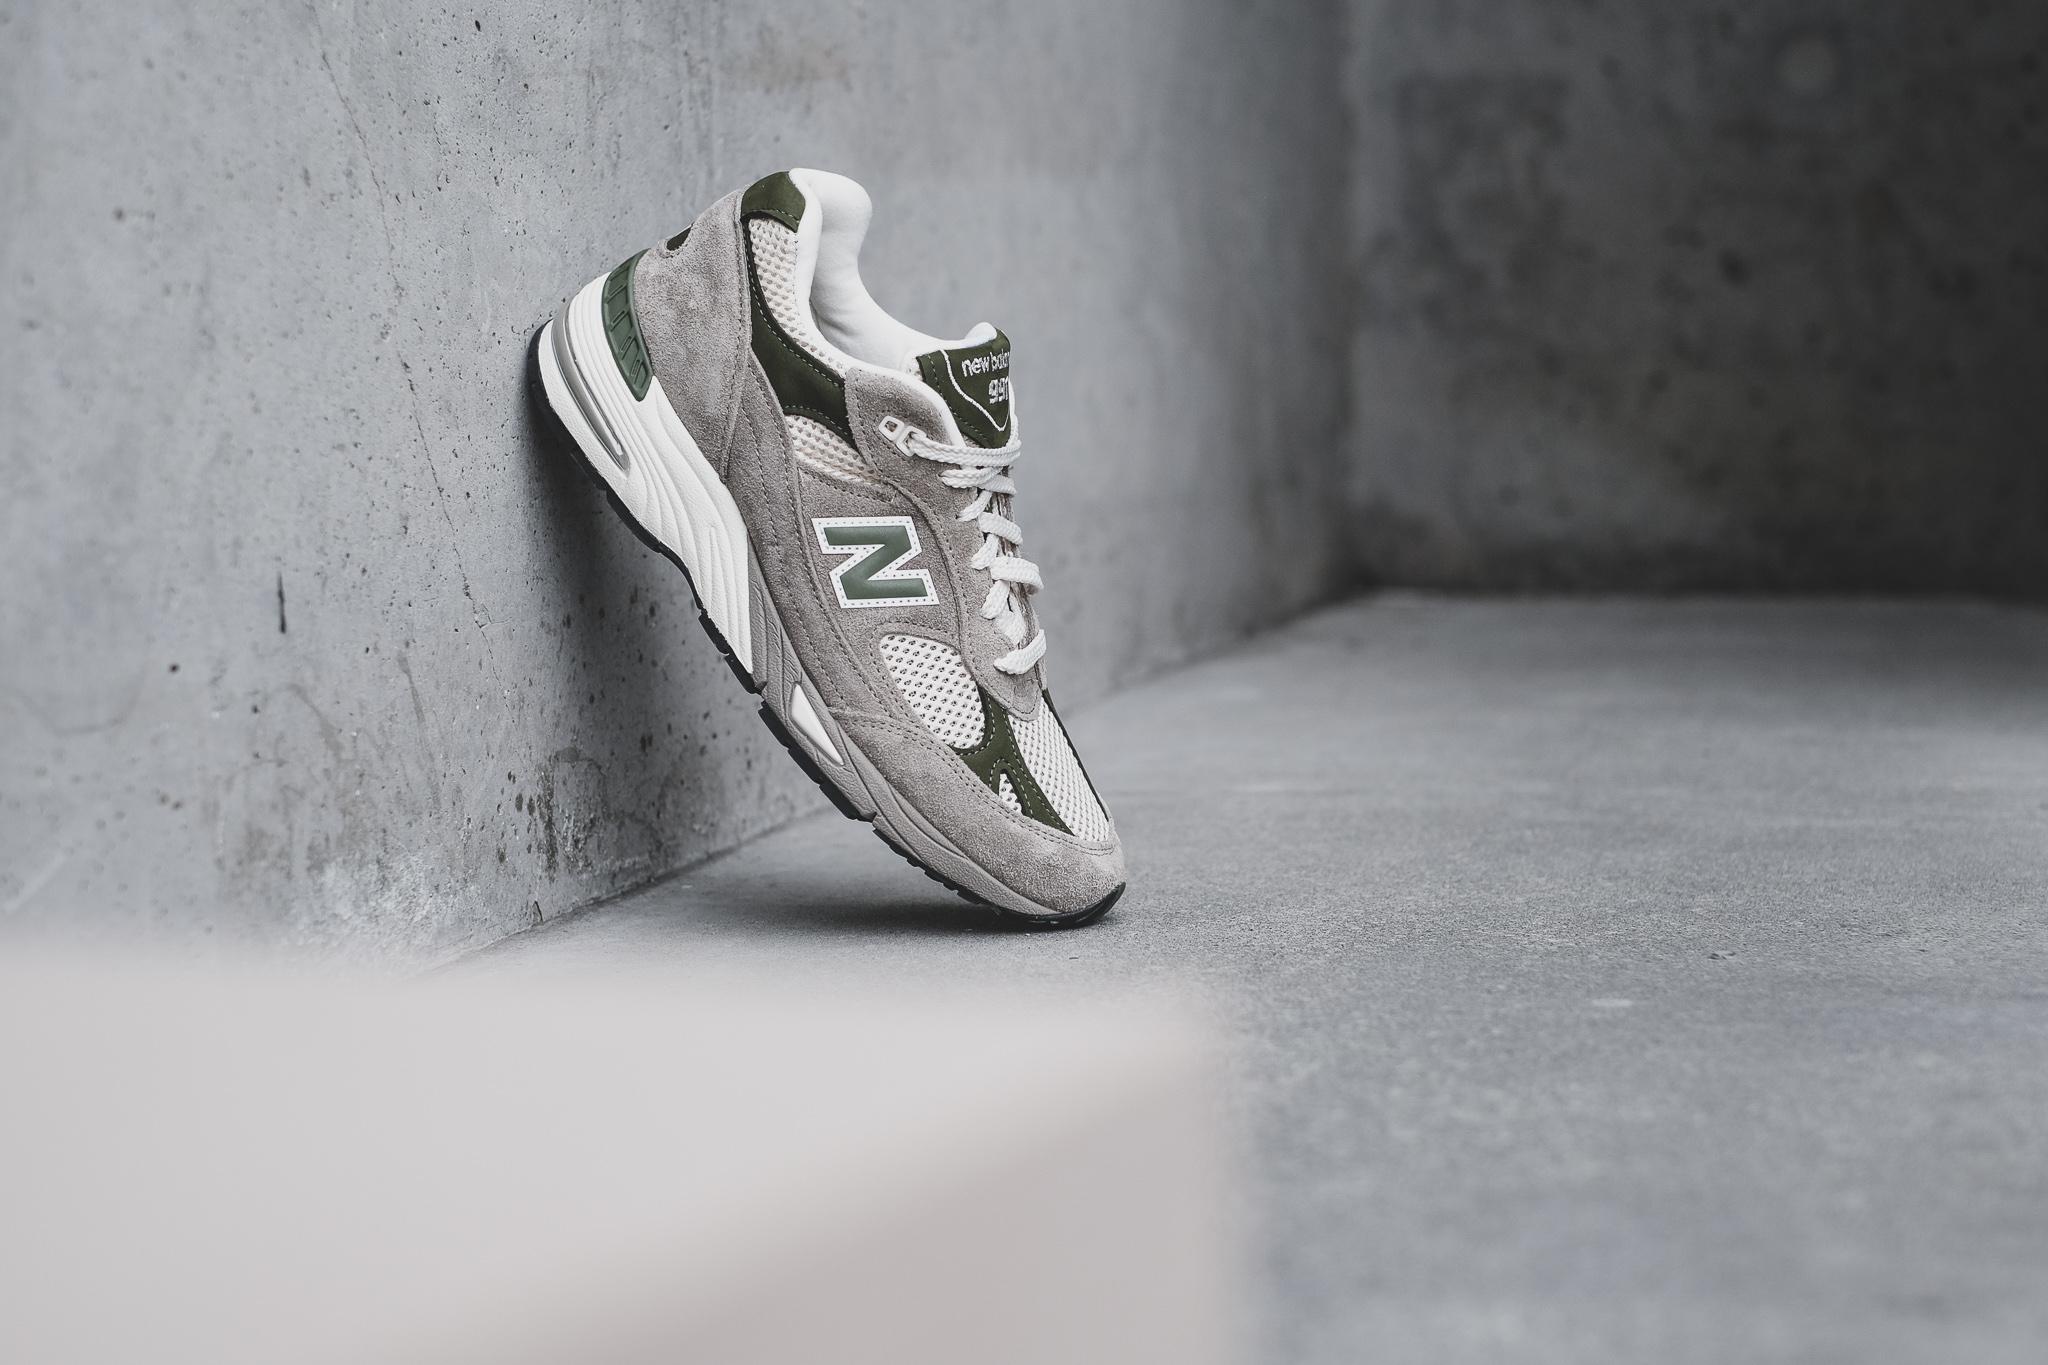
The blurred shape in the foreground here gives some perspective to the scene and also frames the shoe well. Try it yourself.
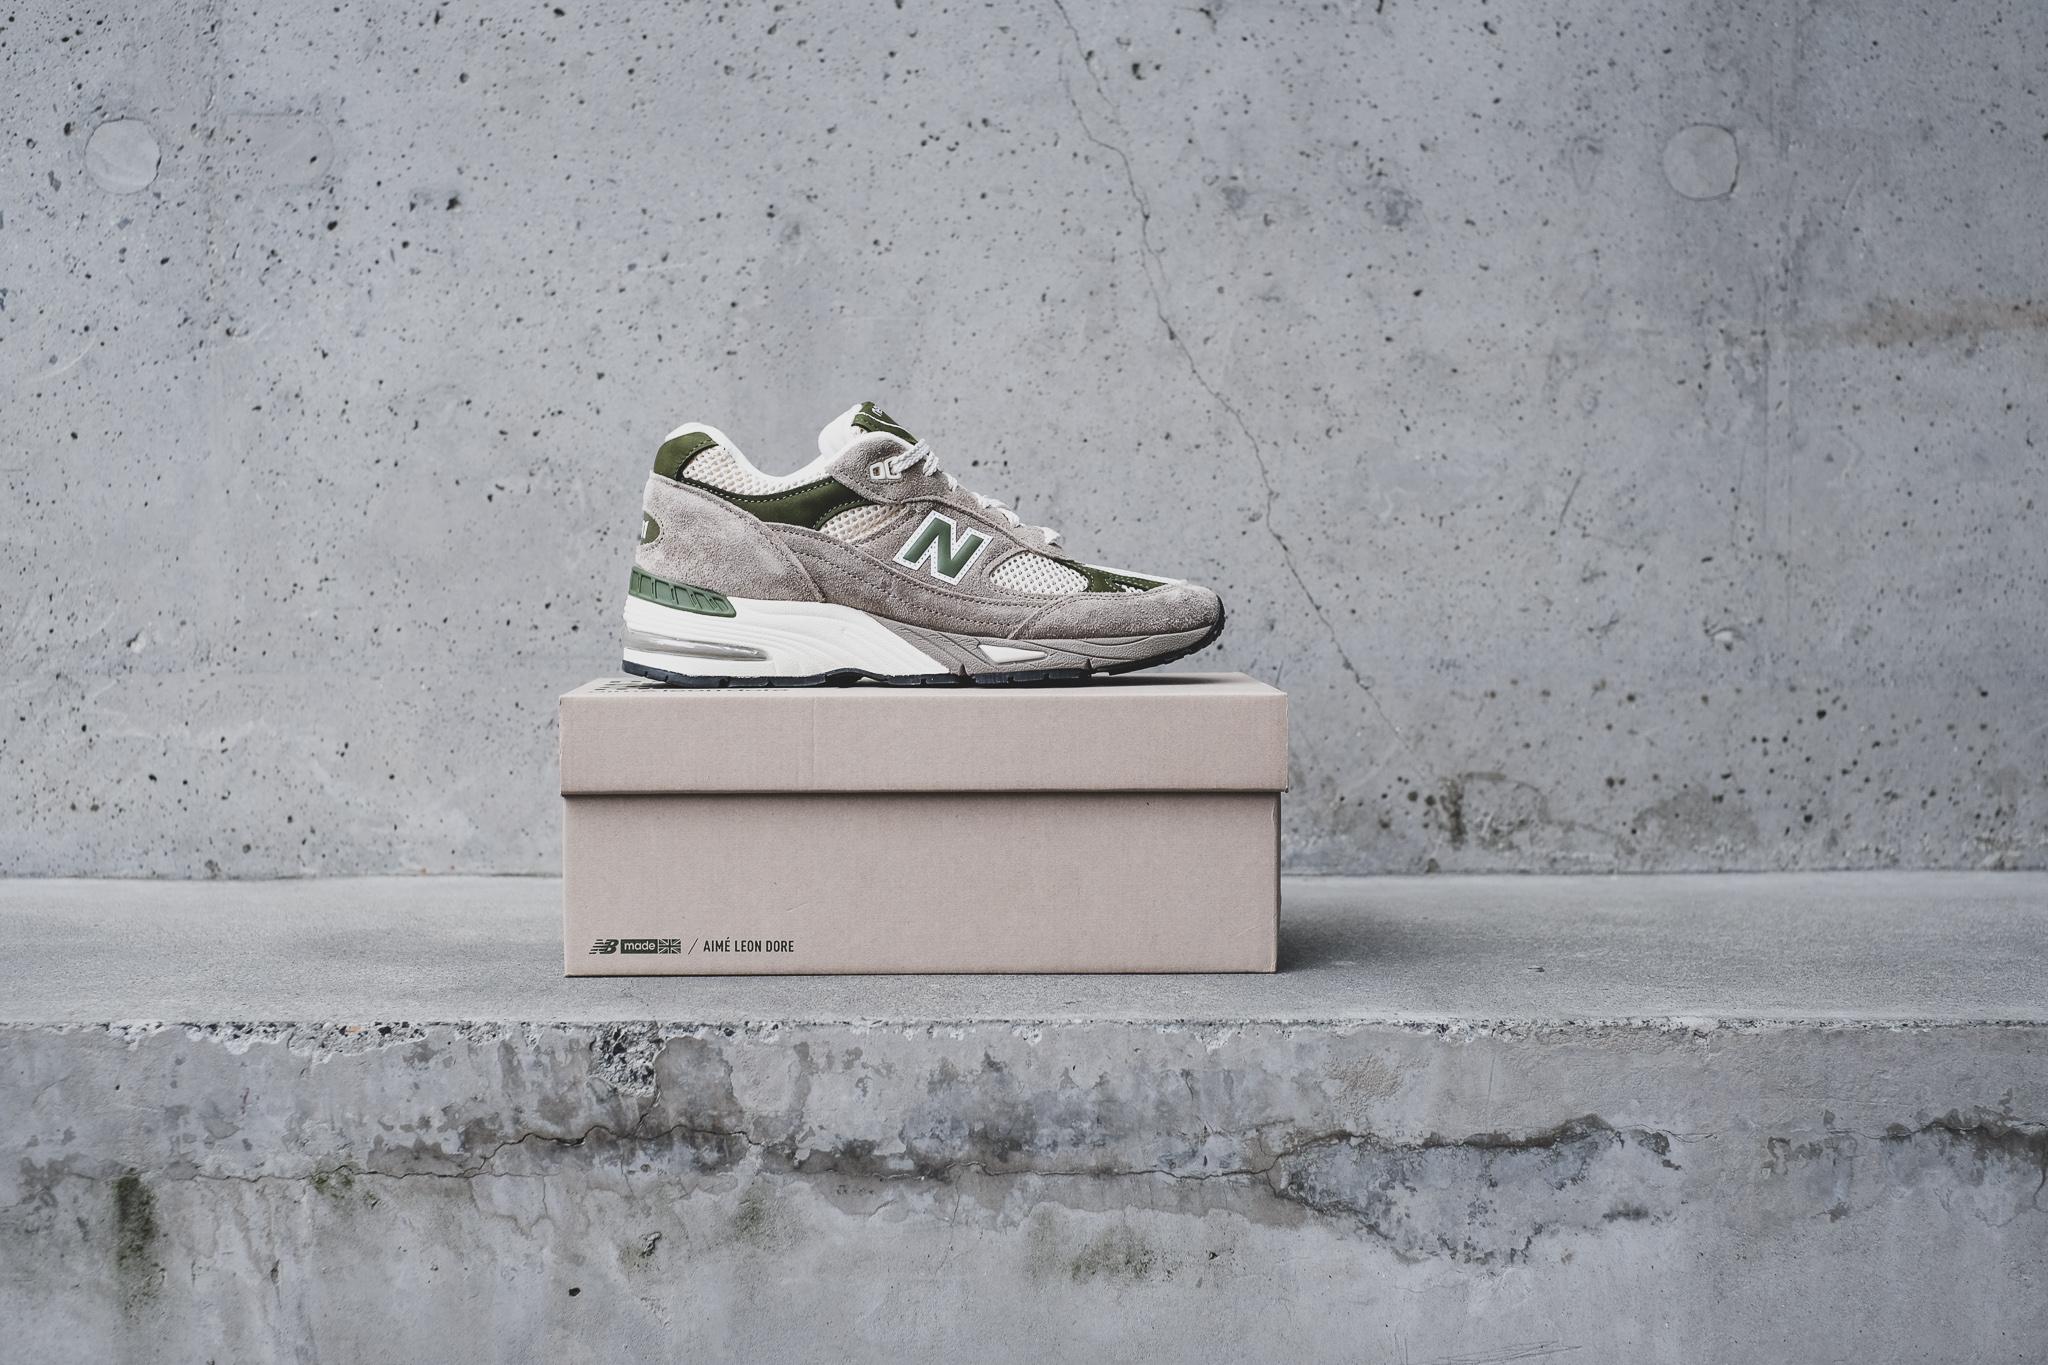
Tip 4: Environment
This one comes down to what your surroundings are like, but the environment you shoot in will play a big part in how captivating your images are. Posting up in the kitchen with your kicks on the dish rack is unlikely to let them shine the way they deserve, ya know?
“I really like clean, concrete looks. I’m always searching for those sorts of places. Whatever you go for, you want to make sure the area is uncluttered and free from distractions. So I’ll always avoid taking photos where there are ugly street signs or anywhere where there’s dirt or rubbish on the ground.”
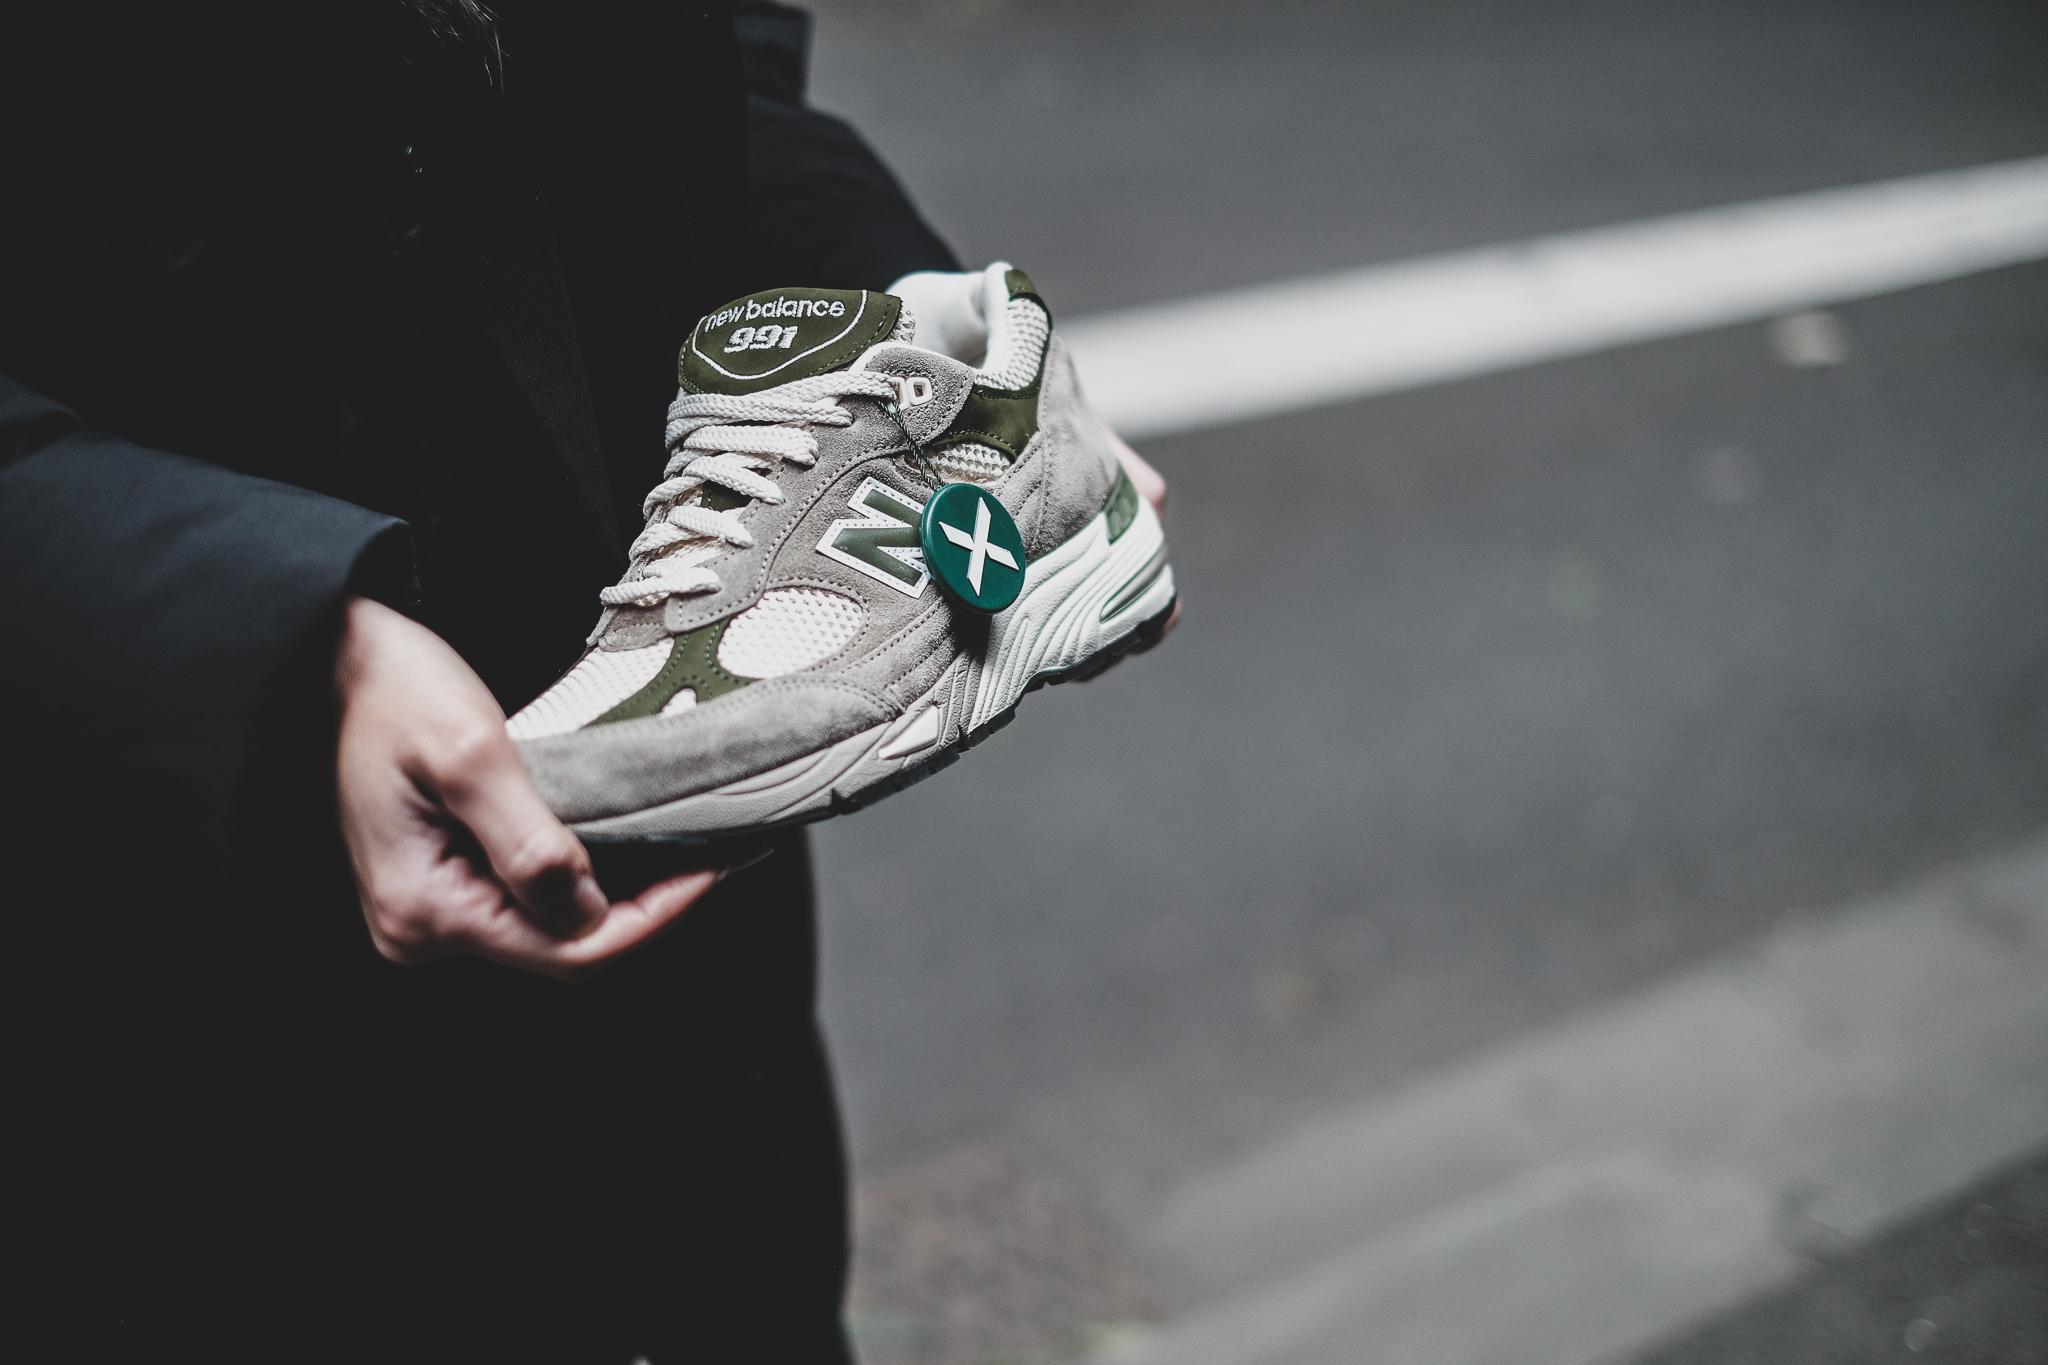
Tip 5: Laces
You know, the details are what really matter. They’re what separate a great photo from a good one, and Chris is here to give you a couple of gems on things to look out for.
“Laces have to be consistent and neat. It doesn’t matter whether you lace over or under, they just have to be consistent and neat – no twisted laces. Usually you would tuck them into the shoe as well but for certain shoes you can’t do that.”
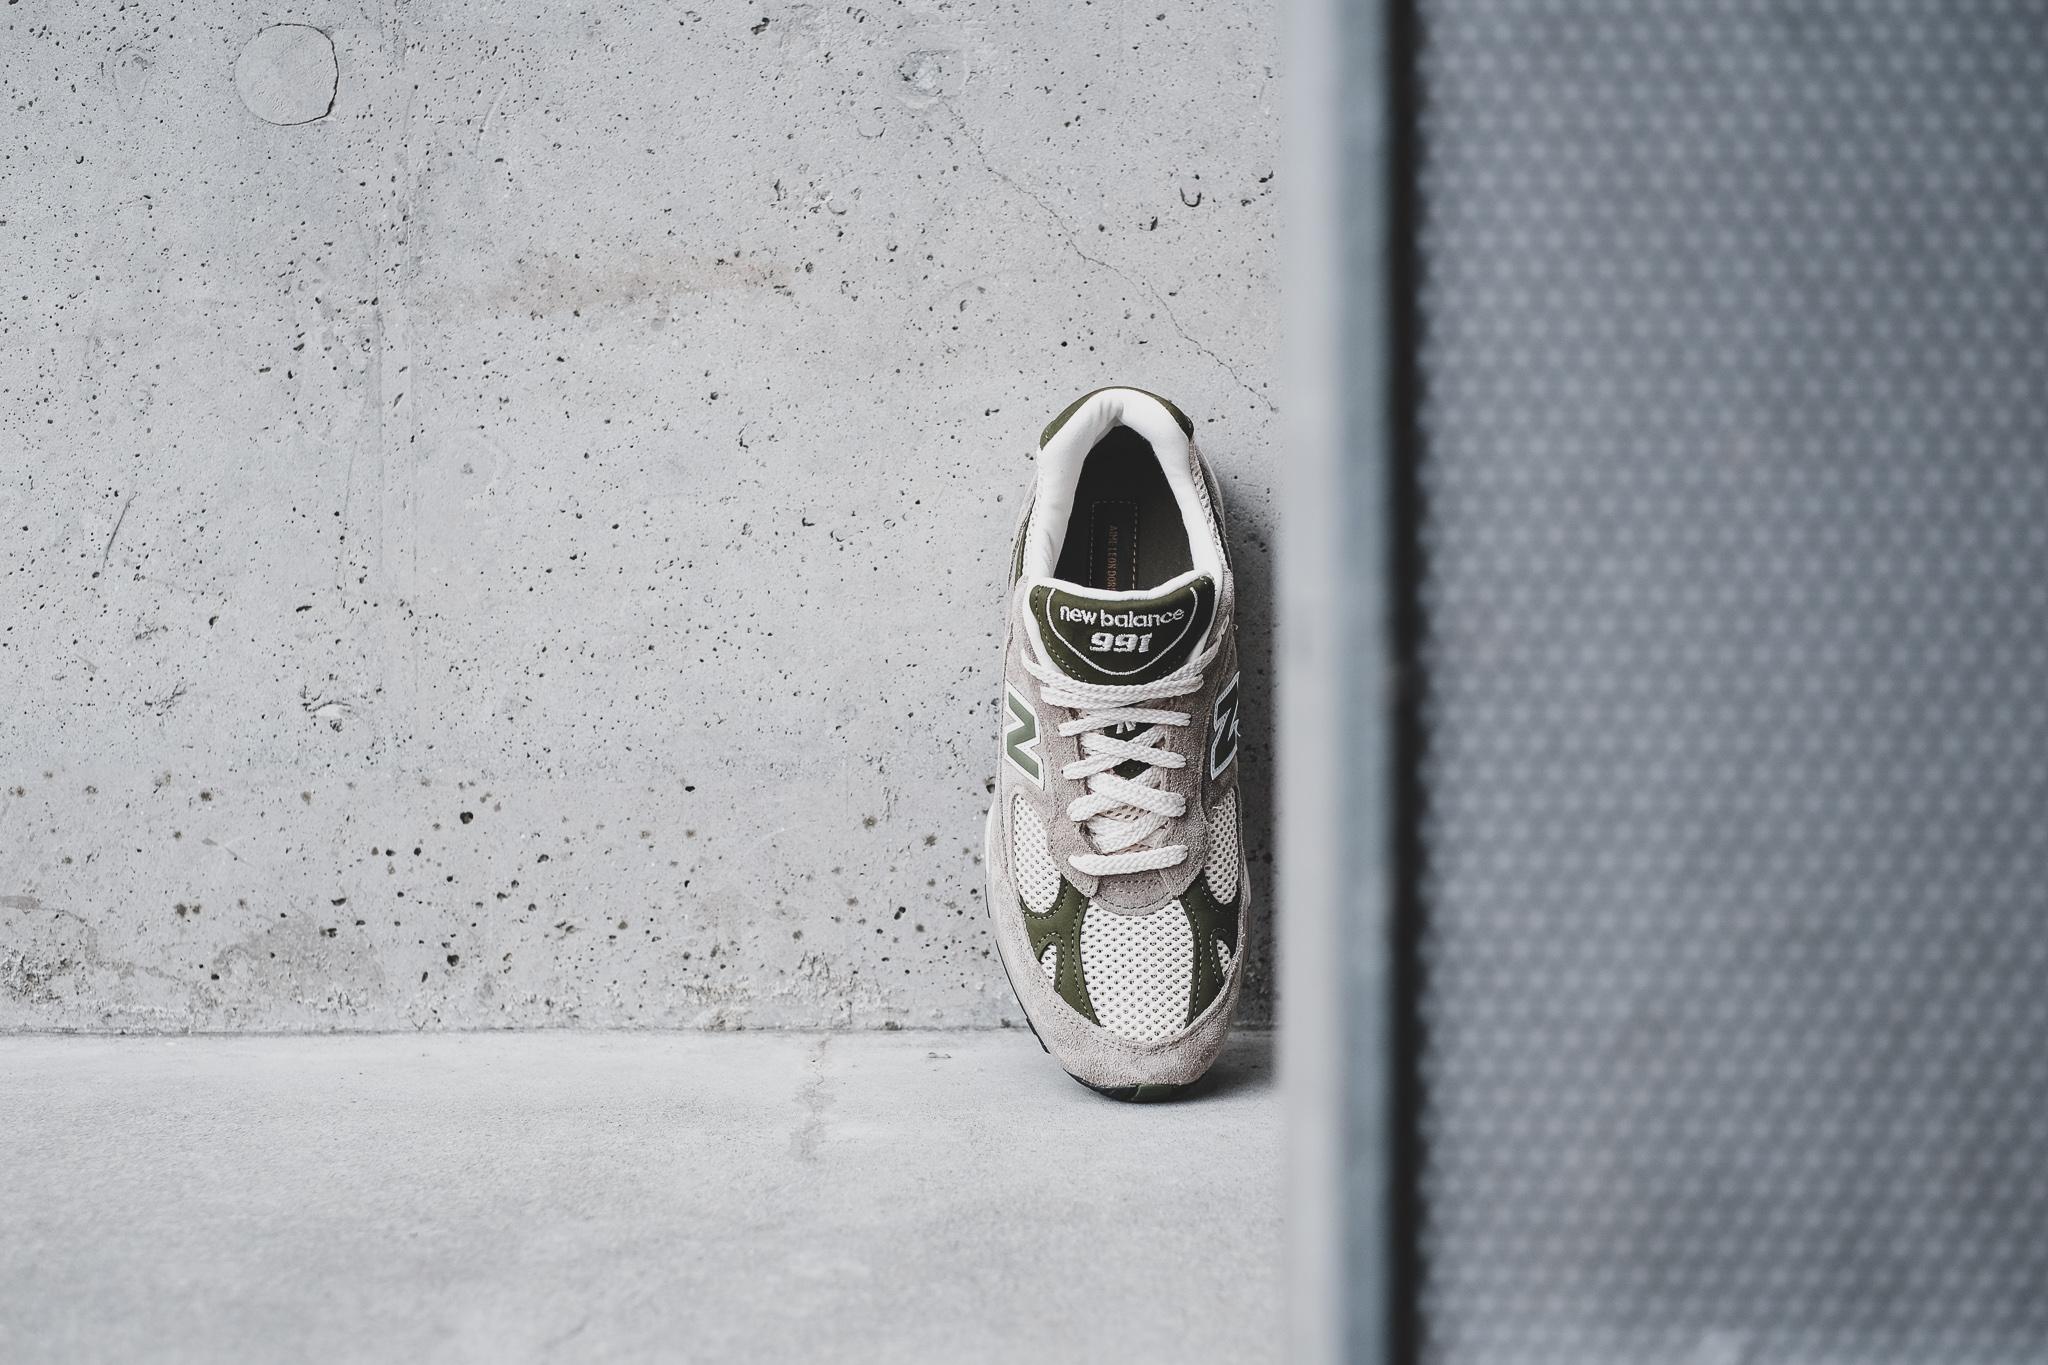
“The other thing on a similar topic is the shoe filler. If your shoes come with the paper or cardboard inserts to help keep the shape, you should leave those in to take photos. It can help the tongue stay in position and stop the toebox sagging, but be careful not to catch the shoe filler in your pictures.”

So there you have it. 5 tips from a pro to help you capture some heaters of your next pair. You should definitely follow Chris on Instagram here. Now get out there, and don’t forget – #GotItOnStockX


